How to Use a Memory Stick (in Windows XP)
This is a simple and Easy to use step-by-step guide on how to use a memory stick.
This is a simple and Easy to use step-by-step guide on how to use a memory stick.

Introduction
Memory Sticks, or Flash Disks, or Flash Drives, all refer to the same thing, it is simply a different name. Memory Sticks are the new way to save files; they are safer, faster, stronger, tougher, and larger, than floppy disks. We would recommend that if you are thinking of transferring any files to your home PC, use a memory stick. The following guide is to help setting up and using your memory stick.
Memory Sticks, or Flash Disks, or Flash Drives, all refer to the same thing, it is simply a different name. Memory Sticks are the new way to save files; they are safer, faster, stronger, tougher, and larger, than floppy disks. We would recommend that if you are thinking of transferring any files to your home PC, use a memory stick. The following guide is to help setting up and using your memory stick.
Setting Up
1. Before you Start
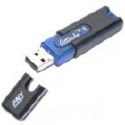
Detach memory stick cap / Extend tab, whichever is appropriate.
3. Insert Memory Stick
Now the Memory stick can be inserted into your PC.
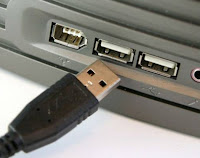
It must be inserted into an empty USB port, like this located usually on the front of the PC
To insert simply ensure the stick is the right way up and push memory stick into slot until it stops, If you cannot insert the stick turn it around horizontally and try again.
4. Windows Checking
The PC you are using should then recognize that a memory stick has been inserted and will display several boxes informing you that it has recognized your memory stick or installing new hardware.
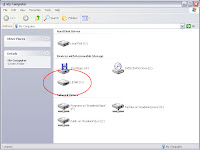
 These will disappear after a few moments so don't worry, just wait and let the computer recognize the new device. The computer should then add an extra Drive to your 'My Computer'. This is usually labeled as removable disk or traveldrive and it can be any letter not taken up by any other drive. To get to 'My Computer', starting from the Desktop simply double click on the 'My Computer' icon, and the window will appear And there you have it, the new drive can now be accessed and used the same as any other drive, the (C:) hard disk or (A:) floppy disk.
1. Before you Start
Detach memory stick cap / Extend tab, whichever is appropriate.

3. Insert Memory Stick
Now the Memory stick can be inserted into your PC.
It must be inserted into an empty USB port, like this located usually on the front of the PC
To insert simply ensure the stick is the right way up and push memory stick into slot until it stops, If you cannot insert the stick turn it around horizontally and try again.
4. Windows Checking
The PC you are using should then recognize that a memory stick has been inserted and will display several boxes informing you that it has recognized your memory stick or installing new hardware.
 These will disappear after a few moments so don't worry, just wait and let the computer recognize the new device. The computer should then add an extra Drive to your 'My Computer'. This is usually labeled as removable disk or traveldrive and it can be any letter not taken up by any other drive. To get to 'My Computer', starting from the Desktop simply double click on the 'My Computer' icon, and the window will appear And there you have it, the new drive can now be accessed and used the same as any other drive, the (C:) hard disk or (A:) floppy disk.
To Save or Open your workDepending on what type of program you are using will depend on what you have to do to save your work.
If you are at home and using your memory stick you should be able to save and open files straight to the memory stick from within most programs. Simply save files by going to 'File' then 'Save As', then changing the Save in: box to the memory stick, which can be selected from the drop down list, and then click Save. Similarly click on File Open to open the file.
How to Copy Files to your memory stick
Open up your 'My Documents' (or wherever the documents are saved)
Select the files you wish to copy, (to select multiple files hold down Ctrl and select another file).
Then Click on Edit, then Copy.
Then Navigate to your F: Drive by opening up, My Computer and going to the (F:) drive
Then click on Edit, Paste, and the files you selected should then be copied onto your Memory Stick.
Removing Memory StickOnce you have finished your work you must do the following before removing your memory stick, failure to follow this procedure may make your memory stick unusable or cause you to lose files saved recently.
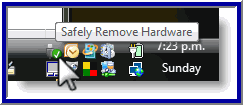
Left Click on the Removable Hardware Icon(green arrow on
 task bar) in the right hand corner of the screen.
Select, and then click the option, Stop USB Device (F:)
Now you can remove your memory stick from the machine.
Care of USB Memory Sticks
Avoid contact with extreme heat, cold, magnetic fields and liquids. All memory sticks come with a cap to protect the electrical contacts - Use it!Take care not to leave your memory stick in a PC. Label your memory stick so it's easily recognizable as yours. Memory sticks are cheap and easy to replace, your data may not be! Have you got a backup? Ensure that you remove the memory stick in the correct way by stopping it first.
Great report! I am agree with the writer's point of view.
ReplyDeleteThe deletion of details nearly always directs a user to some sense of discontent.
A number of recover file software are already launched by the experts, to make certain that an individual may easily retrieve their erased info.
Individual need to be well aware of the available data files restoration methods guaranteeing that he is able to handle the data removal situation in a very best way.
outlook corrupt pst